venerdì 12 dicembre 2014

Ghirlanda di Natale

Ma è solo una mia impressione o queste prime settimane di dicembre sono
**volate via**
alla velocità della luce? o_o
Noi ancora non abbiamo tirato fuori gli addobbi (in realtà non sono nemmeno sicura di dove siano finiti albero e palline dopo il trasloco, aiuto!)
però almeno qualcosa di festivo nella nostra casina c'è già
ed è la mia nuova ghirlanda fuoriporta, in versione natalizia ovviamente
per dare il benvenuto al Natale, all'inverno e a chiunque verrà a trovarci :-)

Is it me or these first two weeks of December has gone by at the speed of light? o_o
We haven't even decorated the Christmas tree yet (actually I don't even know where it's gone after we moved!)
but at least there is something festive in our little floor
it's my new Christmas wreath that's already hanging on our front door
to welcome Christmas, winter and everyone who comes visit us :-)


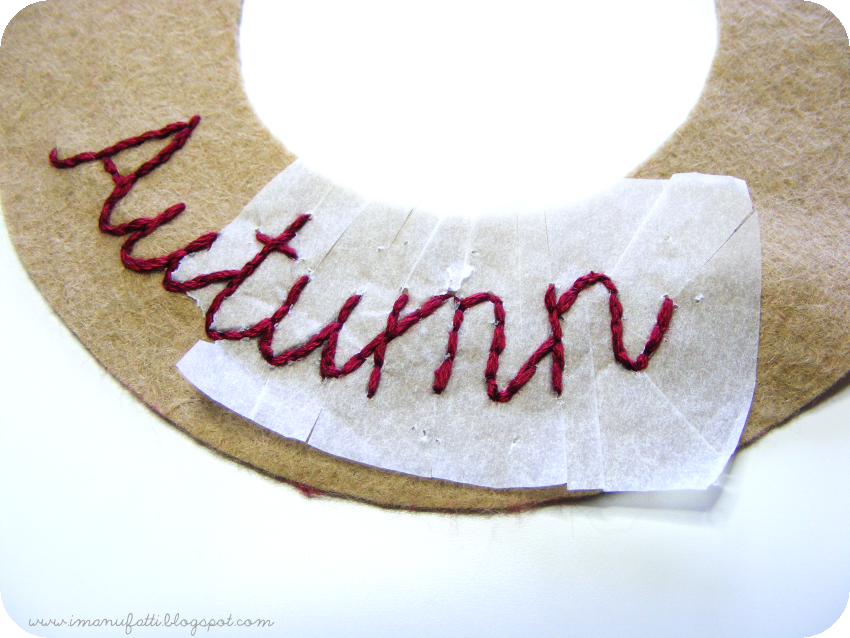
Per realizzare questa ghirlanda, il procedimento da seguire è praticamente lo stesso della mia ghirlanda autunnale (che trovate qui), con alcune piccole variazioni.

Il materiale che ho usato per creare questa ghirlanda è:
 feltro bianco, verde in tre tonalità diverse e rosso
 filo semplice da cucito bianco
 chiodi di garofano
 un campanellino dorato da 1,5 cm
 filo moulinè rosso e verde muschio
 filo crochet sottile di cotone rosso, per appendere la ghirlanda
 imbottitura sintetica
 macchina da cucire
 carta forno
 ago
 forbici affilate (meglio se da ricamo)
 pistola per colla a caldo
 carta e stampante

The instructions to make this Christmas wreath are basically the same as those for the autumn wreath I've made a few month ago (you can find it here), with just a few variations.
To make a Christmas wreath you'll need:
❥ felt, in white, three shades of green and red
❥ simple sewing thread in white
❥ cloves
❥ a 1,5 cm golden sleigh bell
❥ embroidery thread in red and moss green
❥ thin cotton crochet thread in red, to hang the wreath
❥ polyester toy stuffing
❥ sewing machine
❥ baking paper
❥ needle
❥ sharp scissors (better if embroidery)
❥ hot glue gun
❥ paper and printer

Proprio come per la ghirlanda autunnale, iniziate stampando la sagoma in fondo a questo post, ritagliatela, fissatela su del feltro bianco con degli spilli, tracciate il cerchio interno con una matita e ritagliate. Seguite le istruzioni della ghirlanda autunnale per ricamare la scritta Welcome con la "tecnica della carta forno", su una delle due sagome di feltro, con filo mouliné rosso a punto indietro.
Ai lati della scritta, ricamate tre nodi francesi con filo mouliné rosso e due foglioline a punto margherita con filo mouliné verde. Sempre come nella ghirlanda autunnale, cucite le due parti partendo dal cerchio centrale, con filo bianco e punto festone, e imbottite a mano a mano che cucite il bordo esterno.

Start by printing the templates at the bottom of this post, and just as for the autumn wreath pin the template on a piece a white felt, trace the inner circle with a pencil and cut it out. Follow the autumn wreath's instructions to embroider the Welcome writing using baking paper technique, one one of the two wreath piece, in red embroidery thread using back stitch. Make three red French knots and two leaves using lazy daisy stitch, at both ends of the writing. Start sewing the inner circle first using blanket stitch and stuff the wreath as you go on sewing the outer edge.
Per creare le foglie, ripiegate a metà un rettangolo di feltro verde e ritagliatelo a semicerchio, quindi spuntatene il bordo come nella foto, per dargli la forma di una foglia di agrifoglio.

To make the leaves, fold a rectangular piece of green felt, pin it and cut a semicircle. Then, trim the edge as pictured, to give it a holly-leaf shape.
Per creare le bacche, ritagliate tre cerchietti di feltro rosso usando la sagoma di carta apposita, quindi imbastitene i bordi con filo rosso, riempite con poca imbottitura sintetica, tirate con decisione il filo per chiudere l'apertura e cucite il fondo da parte a parte fino a richiuderlo completamente. Con la punta delle forbici, fate un piccolo taglio al centro di ogni bacca e inserite i chiodi di garofano.

To make the berries, cut out three red circles using the paper template provided, tack each circle along its edge with red thread, fill it with a bit of polyester stuffing, pull the thread firmly to close the opening completely and sew it.Make a tiny cut at the centre of each berry with the tip of the embroidery scissors and insert a clover.

Cucite la venatura centrale delle foglie a macchina con filo bianco, quindi incollate le foglie sulla ghirlanda con colla a caldo (spalmate una piccola quantità di colla alla base di ogni foglia), a spina di pesce partendo dalla scritta verso il centro della ghirlanda; una volta finito con le foglie, passate ad incollare le bacche.

Sew a straight line on each leaf with the sewing machine and glue the leaves on the wreath from the writing down to the centre, as pictured, using hot glue (spread a thin layer of hot glue to the bottom of each leaf). Glue the berries in place when done. 
Per aggiungere il campanellino al centro della ghirlanda, fate passare il filo attraverso la ghirlanda dal centro verso l'alto; fermate il filo con un nodo poco sopra il campanellino (fate qualche prova per trovare il punto giusto in cui annodare il filo per far stare il campanello al centro) e infine annodatene le estremità a formare un cappio, da cui appenderete la ghirlanda finita.

Poke the needle with the red crochet thread and the sleigh bell through the wreath, from the centre to its top; stop the thread with a knot a few cm above the bell (make sure the bell will sit perfectly centred). Knot the ends of the thread together in a loop.

Ed ecco qui, ghirlandina pronta! :-) 

And that's it, your wreath's ready! :-)


Cosa c'è di più natalizio del profumo dei chiodi di garofano e del tintinnìo allegro di un campanellino? ^_^

Is there something more Christmassy than the smell of clovers and the cheerful jingling of a sleigh bell? ^_^

{apri l'immagine in una nuova scheda/finestra e stampa le sagome mantenendo le dimensioni del file originali!}
{open the image in a new tab/window and print the templates keeping the original file size!}
Per favore, rispetta il mio lavoro e la mia creatività: se vuoi realizzare e pubblicare sul tuo blog un oggetto partendo da questo tutorial, sei gentilmente pregato/a di citarne la fonte con un link a questo post. La vendita di questo tutorial, di oggetti realizzati seguendo questo tutorial e la riproduzione per intero di questo tutorial su un altro sito sono espressamente vietate. Grazie!
Please, respect my work and my creativity: if you want to make an item from my tutorial or to blog about this project, remember to credit me and link back to this post. Do not reproduce my entire tutorial on your site. This tutorial is for non commercial use only. Thank you!

A presto!

giovedì 11 dicembre 2014

Fiocchi di carta

Chi non ne ha mai fatti, da bambino, di fiocchi di neve origami? Piegavi il foglio in quattro, ritagliavi, aprivi e... magia! ecco un [non sempre perfetto] fiocco di neve tra le mani!
Io li adoro, quando lavoravo a scuola con i bimbi ne avrò fatti un milione
Appiccicati ovunque, più che un'aula di scuola elementare pareva di stare sul pack ^_^
Ma, per quanto sia veramente bellissimo (e rilassante, anche), fare i fiocchi di neve origami richiede davvero un bel po' di tempo, specie se si ha la tendenza a complicare sempre più i motivi e le forme da ritagliare (eccomi).
Così, per "spicciare" un po' il tutto, qualche giorno fa ho avuto una mezza epifania: fare dei fiocchi di carta usando due fustelle decorative, cerchio scallop e cuore allungato.
Il risultato non è certo paragonabile a quello dei fiocchi origami, però ha dalla sua l'essere davvero super-veloce e anche divertente da fare.


Io ho usato degli scarti di carta da disegno (quella un po' più spessa, da 200gr) così, oltre ad aver abbellito le finestrelle della mia stanzetta a costo zero, ho fatto anche un po' di riciclo creativo, che non fa mai male ^_^  Ma ovviamente ogni tipo di carta va bene, magari colorata o decorata a tema natalizio :-)


Per attaccare alla finestra i miei fiocchini di carta ho usato dei pezzetti di nastro biadesivo, che ho incollato al centro di ogni fiocco.


Non vedo l'ora che sia buio per uscire e vedere l'effetto dei miei fiocchi di neve dall'esterno, con la luce accesa nella mia piccola craft room.


Ma anche con la luce del sole, l'effetto non mi dispiace affatto :-)


Sto preparando un nuovo tutorial per cui a prestissimo!

lunedì 1 dicembre 2014

Facebook Christmas giveaway

Per chi se lo fosse perso, sulla mia pagina Facebook c'è il mio
GIVEAWAY DI NATALE
Per partecipare, correte su Facebook (www.facebook.com/imanufatti) e lasciate un commento in cui dite quali sono i vostri cibi / dolci natalizi preferiti a cui proprio non sapete rinunciare! Il giveaway chiude giovedì 4 dicembre alle 16! L'estrazione sarà casuale e il fortunato vincitore verrà da me contattato via messaggio privato, sempre su Facebook. In bocca al lupo! ^_^

In case you missed it, I'm having a Facebook
CHRISTMAS GIVEAWAY
To join in simply go to my Facebook page (www.facebook.com/imanufatti) and leave a comment saying what is your favourite Christmas food / sweets that you really can't do without! The giveaway ends on Thursday, 4th December at 4 pm CET. I'll randomly pick a name and contact the lucky winner via private message on Facebook.
Good luck! ^_^

mercoledì 12 novembre 2014

Crafty Christmas Tutorial Link Up (ovvero il mio tutorial più corto di sempre)

Quest'anno,  per la seconda edizione del
 Crafty Christmas Tutorial Link Up  
(qui i dettagli dell'iniziativa e il mio tutorial della scorsa edizione) ho pensato ad un progetto di una semplicità quasi ridicola, talmente essenziale che per spiegarlo bastano soltanto due foto! 
L'unico requisito indispensabile per affrontarlo al meglio è una vista da 10/10 (o, se siete talpe come me, una lampada con lente d'ingrandimento) perché i dettagli da ricamare sono veramente microscopici.
For this year's edition on the
 Crafty Christmas Tutorial Link Up  
(here the details about it and my project for the first edition) I've thought of a super-simple project that is so easy I only need two photos to explain it! 
The only thing you'll need to pull it off the best is a 20/20 vision (or, if you're a mole like me, a magnifying glass lamp) as the embridered details are truly microscopic.
Se sono ben fatti e non troppo appariscenti, i bijoux di stoffa mi piacciono molto, anche se su di me proprio non ce li vedo (sul fronte gioielli mi tengo sempre molto minimal, è più forte di me). A Natale, però, mi piace giocare un po' più del solito con gli accessori, per cui credo proprio che questo pupazzetto di neve non finirà a fare la muffa in un cassetto ma si farà più di un giretto aggrappato al mio collo, nelle serate invernali che spero saranno belle fredde (e chissà magari pure innevate... oh sarebbe bellissimo! *_* )
I really love fabric jewelry, but only if they're not too shabby and definitely not too flashy, as I am not a statement jewelry type of person (I always end wearing minimal things, can't help it). However, I think it's really fun to play with all the accessories at Christmas, so I think that I'll do wear this pendant more than once for sure, in cold (and hopefully snowy - oh how I'd love that! *_*) winter evenings out.

Per realizzare un pupazzo-ciondolino come questo, l'occorrente è:
feltro avorio / bianco naturale, ve ne bastano due quadratini di 6x6 cm
un pezzettino di nastro di organza del colore che preferite, largo 7 mm
due mini bottoncini neri di 6 mm di diametro (io li ho comprati qui)
2 cm di nastro di raso nero, largo 4 mm
circa 6 cm di spago di canapa sottile
filo mouliné / da ricamo nero, senape e pesca
filo semplice da cucito bianco
❄ ago, spillo, forbicine da ricamo, carta e stampante per stampare la sagoma in fondo a questo post.

To make a snowman pendant like this, you'll need:
❄ natural white felt, two 6x6 cm squares are enough
❄ a piece of organza ribbon in your fav colour, 7 mm wide
❄ two black mini buttons, 6 mm (got mine here)
❄ a 2 cm piece of black satin ribbon, 4 mm wide
❄ approx. 6 cm of thin hemp twine
❄ embroidery thread in black, mustard and peach
❄ white simple embroidery thread
❄ needle, pin, embroidery scissors, paper and printer to print out the template at the bottom of this post.

PROCEDIMENTO / INSTRUCTIONS
1. Stampate e ritagliate la sagoma in fondo a questo post, fissatela sul feltro avorio con uno spillo e ricavatene un pupazzo di neve. Usate quest'ultimo come sagoma per ritagliarne un secondo (in questo modo, i due pezzi saranno perfettamente identici e combacianti).
1. Print the template at the bottom of this post and cut it out. Pin it on white felt and cut out a snowman piece. Use this as a template to cut out a second snowman (this is the best way to get two perfectly matching pieces).
2. Su uno dei due pupazzi, ricamate due occhietti neri (due nodi francesi), la bocca nera (a punto dritto), il naso senape e le guance pesca (entrambi a punto satin). Usate filo mouliné diviso a metà (quindi cucite con 3 fili). Cucite i due bottoncini sulla pancia del pupazzetto, con filo bianco.
2. Take one snowman and embroider two black French knots for the eyes, a black mouth using straight stitch, a little mustard triangle for the nose and two peach cheeks, using satin stitch. Use embroidery thread previously separated in half (which means you'll sew with a 3-strand thread). Sew the tiny black buttons on the snowman's belly in white sewing thread.
3. Sull'altro pupazzo (quindi sul retro) cucite lo spago di canapa e il nastrino di raso nero piegato a metà. Mi raccomando, date pochi punti a sopraggitto dentro al feltro, senza trapassarlo da parte a parte.
3. Take the second snowman piece and sew the hemp twine and folded black satin ribbon with a few whipstitches into the felt, not through it.
4. Unite i due pupazzi e cucite a punto festone con filo bianco, partendo dal fondo del pupazzo. Lasciate una piccola apertura per inserire l'imbottitura, quindi chiudete con un piccolo nodo sul retro. Una volta finito, legate il nastro di organza attorno al collo del pupazzetto, a mo' di sciarpina (consiglio di bruciare leggermente le estremità del nastro con un accendino, di modo che non sfilacci).
4. Overlap front and back snowmen and sew together using blanket stitch and white thread, starting from the bottom. Leave a tiny opening to insert some stuffing, them sew up the gap and secure the thread with a little knot at the back. Tie a piece of organza ribbon to the neck of the snowman to make the scarf (to avoid fraying, use a lighter to burn the ends of the ribbon slightly).

Ecco fatto, ciondolino finito :-) Più veloce di uno starnuto!
There you go, your pendant is ready :-) Faster than a sneeze!
Io l'ho attaccato ad una lunga catenella d'argento, ma volendo può anche diventare un charm per il cellulare, un portachiavi poco ingombrante o anche, perché no, un mini addobbo per l'albero di Natale. Fatene pure quel che più vi piace, e se una volta ultimato vi va di mostrarmelo, mandatemi una foto e sarò felice di pubblicarla sulla mia pagina Facebook (con un link al vostro sito/blog/pagina, ovviamente!)
I've attached it to a long chain but it can easily become a phone charm or a not-too-bulky keychain or even a teeny tiny Christmas tree ornament.
Feel free to customize it as you please, and if you'd like to show me your finished snowman, send me a photo and I'll be happy to share it on my Facebook page (with a link to your website/blog/page of course!) 

A presto con i link a tutti i progetti partecipanti a questa edizione del Christmas Crafty Tutorial Link Up!
I'll be back soon with the links to all the project that took part in this year's Christmas Crafty Tutorial Link Up!
Ed ecco qui un mosaico di foto (e dei rispettivi link) di tutti i progetti partecipanti al link up di quest'anno:
And here's a mosaic with pics (and links) of all the projects partecipating in the link up:
Da sinistra, in senso orario:
From the left clockwise:
Christmas Card String & Pegs - Fizzi Jayne Makes

Felt Christmas Stocking - Vicky Myers Creations

Felt Holiday Wreath - The Felt Store

Penguin Pocket Friend or Ornament - Lulu & Celeste

Saint Nick Ornaments - Homemade at My Place

Retro Photo Christmas Cards - Bugs and Fishes

Modern Felt Advent Calendar - Hugs are Fun

Felt Christmas Ornaments - Marc's Treasure Basket

Che ve ne pare? Io li trovo tutti molto belli, ce ne sono alcuni da provare assolutamente! In più ho scoperto tanti blog nuovi da seguire, che è sempre cosa buona è giusta :-) Evviva il Crafty Christmas Tutorial Link Up!
What do you think? I think they're all super-inspiring and definitely worth a try! Plus, I've discovered a lot of new crafty blogs to follow, and that's always a good thing :-) So hurrah for the Crafty Christmas Tutorial Link Up!

sabato 25 ottobre 2014

Staccare.

A volte bisogna farlo.
Per liberare la mente, per pensare meglio.

Qualche giorno fa ho avuto una specie di "blocco creativo". Sensazione orribile! Malgrado le idee per la testa fossero millemilionieuna, niente di quel che creavo mi riusciva come volevo. Dover buttare tutto dopo ore e ore passate china su un pezzo spesso microscopico di feltro alla luce della lampada, seduta col mal di (fondo)schiena, l'ago in mano e il disastro sul tavolo da lavoro (e il pensiero che poi dovrò pure rimettere tutto in ordine)... un nervoso a dir poco caustico.

Poi, vuoi la mia testardaggine ("no, ora non mi schiodo da qui finché non viene bene come dico io"), vuoi lo zampino di San Pinterest che l'entusiasmo di creare (e l'ispirazione, anche) riesce a mettermelo sempre, il blocco è passato.
Ma il rimedio migliore, il più infallibile in casi come questo, è uscire, vedere cose belle.
Staccare, appunto.

(da una domenica di sole a zonzo nel Carso)

E voi, avete mai sofferto di blocco creativo? Se sì, qual è il rimedio che vi rimette sulla giusta via?

martedì 7 ottobre 2014

Da papaveri ad anemoni

Vi ricordate dei miei papaveri di feltro della scorsa primavera?
Bene, cambiando i colori e usando lo stesso identico pattern (che trovate qui), ho realizzato questo mazzo di anemoni. Che ve ne pare? A me piacciono tantissimo devo dire, anche se per quanto riguarda il confezionamento dei bouquet sono una vera schiappa.
Do you remember the felt poppies I made last spring? Well, using that same pattern (here) but different colours, I've made a bouquet of anemones. What do you think? I must say I like them a lot, despite my awful wrapping skills.


Buona giornata
Have a lovely day

domenica 5 ottobre 2014

Conigliette vezzose

Forse non dovrei dirlo, però io ADORO questo baby name banner!
E come potrei non amarlo? ci sono ben DUE conigliette! 
Maybe I shouldn't say it, but I really ADORE this baby name banner!
It'd be hard not to do so: there are TWO cute little bunnies there!

Il nome della bimba, che può sembrare bizzarro, è in realtà abbastanza comune qui in Slovenia :-)
Manca may seem an odd baby girl name but is acutally quite common here in Slovenia :-)

Perline e fiorellini dai colori cangianti impreziosiscono ogni lettera
Pearly beads and flower-shaped sequins enhance each letter

E se di questo bel musetto ne facessi una spillina? Rimpicciolendo un po' il cartamodello... che ne dite? Quasi quasi ^_^
I'm thinking about turning this cute little face into a brooch
Well a tinier version of course... what'd you say? ^_^
❤ A presto
❤ Back soon 

lunedì 29 settembre 2014

Welcome Autumn

Finalmente è arrivato l'autunno, hurrà!
Che autunno è lì da voi? Qui finora il tempo è stato e continua ad essere veramente splendido, c'è il sole ma fa fresco abbastanza da dover mettere il cardigan durante il giorno e una giacchina la sera. ADORO questo clima e questa stagione!
E come festeggiarla se non con un bel tutorial? J
Autumn's finally come, hurrah!
Is it a nice autumn there? The weather here is splendid, sunny but chilly enough to wear a cardigan during the day and a jacket in the evening. I simply ADORE it!
Here's a new tutorial I've made to celebrate my fave season of the year
 J


È la prima volta che creo una ghirlanda con il feltro
e di certo non sarà l’ultima, anche perché la sua realizzazione è davvero semplice e veloce
beh, ricamo a parte ^_^
E poi è anche un buon modo per riutilizzare quegli scampoli di feltro messi da parte perché "non si sa mai, prima o poi mi potrebbero servire" (io ne ho una scatola piena!)
This is the first felt wreath I make
and it surely won't be the last, as it is such a quick&easy project to make
well, except for the embroidery ^_^
Plus it is a nice way to give new life to all those scraps of felt put aside "in case I'm going to need them" (I've a box full of scraps!)

Per realizzare una ghirlanda come questa, l'occorrente è:

feltro, nei colori dell'autunno. Per le foglie ho usato feltro giallo senape, verde oliva, rosso, marrone in diverse tonalità, arancione; per la base, ho usato feltro color biscotto (2x quadrati di feltro di almeno 15 x 15 cm); per il funghetto, ho usato feltro rosso, bianco e beige
filo semplice da cucito, nei colori biscotto, marrone, rosso, bianco e beige
filo mouliné / da ricamo, nei colori giallo senape, vinaccia e verde olivastro
perline bianche (2 mm)
filo crochet sottile rosso, per appendere la ghirlanda
imbottitura sintetica
forbici appuntite e affilate
ago e spilli
 macchina da cucire
 pinzette
 una striscia di carta forno
 matita, carta e stampante per stampare le sagome in fondo a questo post.

To make a felt autumn wreath you'll need:
 felt, in different colours. For the leaves I've used mustard, moss green, red, two shades of brown, and orange; for the wreath, I've used biscuit felt (at least 2x squares of 15 x 15 cm each); for the toadstool, I've used red, white and beige felt
 simple sewing thread, in biscuit, brown, red, white and beige colours
 embroidery thread / floss, in mustard, burgundy and light moss green
 white seed beads (2 mm)
 thin red crochet cotton thread, to hang the wreath
 polyester toy stuffing
 sharp scissors
 needle and pins
 sewing machine
 tweezers
 a stripe of baking paper
 pencil, paper and printer to print out the templates at the bottom of this post.

COME SI FA / INSTRUCTIONS

1. Stampa e ritaglia le sagome in fondo a questo tutorial. Fissa la sagoma di ghirlanda sul feltro biscotto con degli spilli e traccia il cerchio interno con una matita. Piega il feltro a metà e fai un piccolo taglio al centro del cerchio, quindi ritaglia il cerchio centrale lungo il tratto a matita. Una volta finito, gira la sagoma in modo che ogni eventuale traccia di matita resti sul retro e sia quindi invisibile a ghirlanda finita. 
1. Print and cut out the templates. Pin the wreath template on biscuit felt and outline the inner circle using a pencil. Fold the felt piece in half and make a small cut at the centre, then cut out the whole circle along the pencil trace. After that, turn the wreath piece so that the pencil trace is at the back.

2. Con una matita, ricalca la scritta Autumn sulla striscia di carta forno. Fissa la carta forno sul feltro e ricama usando filo mouliné color vinaccia, a punto spaccato Rimuovi, tagliandola, quanta più carta in eccesso attorno al ricamo - non strappare! Fai dei piccoli tagli alla carta rimasta attorno ai punti e usa delle pinzette per strappare MOLTO DELICATAMENTE tutta la carta rimasta. Ripeti il procedimento per ricamare le foglioline ai lati della scritta, a punto margherita. Togli la carta e ricama tre nodi francesi, con filo mouliné color senape.
2. Trace the Autumn writing on a piece of baking paper. Pin the baking paper on the wreath piece and embroider it with burgundy floss using split stitch. Cut off the as much paper as possible - don't tear it off! Make some cuts to the remaining paper without cutting the stitches and use tweezers to tear off the paper VERY GENTLY. Embroider the tiny leaves (using detached chain stitch) at the sides the same way. Tear off the paper and make three French knots using mustard floss.
3. Fissa la base ricamata su del feltro biscotto e ritaglia per ottenere il retro della ghirlanda. Cuci fronte e retro assieme con punto festone, iniziando dal cerchio interno. Lascia un’apertura di circa 2 cm e inserisci l’imbottitura con l’aiuto di un attrezzo adeguato (io uso il manico di un lungo pennello), quindi chiudi l’apertura e fissa il filo con un nodo sul retro.
3. Use the embroidered piece as a template to  cut out the back of the wreath. Pin and sew front and back wreath pieces together with blanket stitch, starting with the inner circle. Leave a 2 cm open gap and stuff it, using a proper stuffing tool (I use the handle of a long paintbrush). Sew up the gap and secure the thread with a knot at the back.
4. Per creare le foglie, piega uno scampolo di feltro a metà (sul lato lungo) e ritaglia un semicerchio. Ritaglia una ventina di foglie di forme e dimensioni diverse, tra i 3 cm e i 5 cm. Con la macchina da cucire, cuci le venature centrali delle foglie, con filo marrone e punti molto piccoli (1,5 mm). Per non sprecare tempo e filo, cuci le foglie in sequenza una dopo l’altra, senza tagliare il filo. Cuci le foglie alla ghirlanda con pochi punti a sopraggitto, alla base delle foglie.
4. Use scraps of felt to make the leaves. Fold each felt piece in half and cut a semicircle. Make about 20 leaves in different shapes and sizes, from 3 cm to 5 cm. Use the sewing machine to sew  a straight line on each leaf, in brown thread using tiny stitches (1.5 mm). Sew all the leaves in a row, without cutting the thread.


5. Per creare il funghetto, ritaglia un cerchietto di feltro rosso, uno di feltro bianco e un gambo di feltro beige, usando le sagome di carta. Cuci assieme i due cerchietti, con filo rosso e punto festone. Lascia un’apertura di circa 1 cm, inserisci un po’ di imbottitura e chiudi con un piccolo nodo sul feltro rosso.
5. Use the toadstool paper templates to cut out a red circle, a white circle and a beige stalk. Sew the two circles together, in red thread using blanket stich. Leave a 1 cm opening to insert a bit of stuffing, then sew up the gap and secure the thread with a small knot on red felt.
Cuci assieme le estremità della sagoma di gambo, con filo beige a punto indietro (cuci a circa 2 mm dal bordo).
Backstitch the ends of the stalk together, in matching beige thread (keep a 2 mm seam allowance).
Chiudi il fondo con alcuni punti da parte a parte (vedi foto) quindi risvolta il gambo e imbottiscilo. Fissa il gambo al cappello con uno spillo e cuci le due parti assieme con filo beige e punto a sopraggitto, trapassando il gambo da parte a parte.
Sew the bottom of the stalk close, as pictured. Turn the stalk right side out and stuff it. Pin it onto the cap and whipstitch along the edge, across the stalk and into the cap (see picture).

Per aggiungere le perline, usa del filo bianco e fallo passare tra i punti  festone del cappello (tra il feltro rosso e quello bianco), tirando finché il nodo non scompare all’interno. Una volta cucite tutte le perline, fissa il filo con un piccolo nodo sul bordo del cappello, sul feltro bianco.
To add the beads, poke the needle with white thread  in between the blanket stitches of the cap and pull it to make the knot disappear inside the cap. After adding all the beads, secure the thread with a small knot on the edge of the cap, on white felt.


6. Usa il filo crochet rosso per appendere la ghirlanda e il funghetto al centro.
6. Use red crochet thread to hang the wreath and the tiny toadstool at the centre.

Ecco fatto! La ghirlanda autunnale è pronta per essere appesa alla porta di casa J
That’s it! Your autumn wreath is now ready to be hung of your front door J
Meraviglioso autunno a tutti!
Have a wonderful autumn!

{apri l'immagine in una nuova scheda/finestra e stampa le sagome mantenendo le dimensioni del file originali!}
{open the image in a new tab/window and print the templates keeping the original file size!}
Per favore, rispetta il mio lavoro e la mia creatività: se vuoi realizzare e pubblicare sul tuo blog un oggetto partendo da questo tutorial, sei gentilmente pregato/a di citarne la fonte con un link a questo post. La vendita di questo tutorial, di oggetti realizzati seguendo questo tutorial e la riproduzione per intero di questo tutorial su un altro sito sono espressamente vietate. Grazie!
Please, respect my work and my creativity: if you want to make an item from my tutorial or to blog about this project, remember to credit me and link back to this post. Do not reproduce my entire tutorial on your site. This tutorial is for non commercial use only. Thank you!